Category Archives: Uncategorized

Winter Projects Stalled

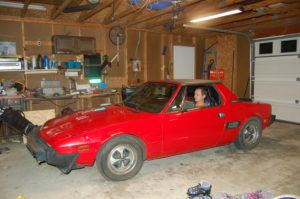
Updating on where I am on the winter projects. Lets Start with the X 1/9. It has been sitting in its temporary home awaiting a new garage. We are converting our current garage to an “in-law suite” for Kendras disabled uncle. Once its completed and his house sells, the garage will be replaced with a more functional detached garage. Although there is a little room to work on it in the temp garage, it is freaking cold and no real room for the heater. the heater is kerosene so it kicks out humidity which I already have an issue with because of the tarp style roof (condensation is a bitch). I hope I dont have a ton of rust to clean up. I know I will have a little.

So the X. Where it sits right now is I had 2 issues. One is when it goes into vtec, it misses like crazy. Late fall I found there was a transistor that was broken. 2 of the legs werent even connected. I bought a new one and soldered it in. Insurance was already switched to storage so I really didnt think flying down the road to test vtec would be smart without insurance. Damn I am getting old, I actually cared about not wanting to get a ticket. the other issue I had was with idle coming off throttle. it hangs about 2200 RPM until I blip the throttle, then it settles. I went through a couple forums and all the suggestions didnt help (iacv, vacuum leak ect). Right now I am running on crome (yes, spelled without an “h”). a free software to tune the honda. Because of the transistor issue it got me thinking if something else could be wrong with the ECU. Well I guess it is time to get a new one. I figured as long as I am going that route, I might as well go with a different tuning setup. Crome isnt bad, but Neptune and Hondata have more to offer. After alot of research and deliberation, I chose Hondata. Why? the number 1 reason why is it hooks up to other industry digital dashboards if I choose to replace mine. Another, albeit minor, reason is it has more industry following. More shops will tune hondata than any other honda tuning hardware/software. Downside. it is more expensive as well as needing a module to connect to my RD-1 digital dash where the neptune was direct plug and play. yup another $$. I think it is a small price to make sure any issues are not ECU related as well as will last for future endeavors. Out of the box I wont see any real performance gains, but even in stock form, I should be able to tune another 10-15 HP from everything I have seen on Dyno vids. Now, if I decide to go with more displacement or turbo…. yeah there is a big boost in HP. Personally, my goal would be a modest 250 WHP. Along with this, hondata allows me to control the temp the cooling fan comes on. right now it is hardwired to a switch. Being mid engine, I had issues with the fan coming on way too hot. The thermoswitch is in the radiator, where the honda is in the engine. this will allow me to kick the fan on at engine temp 186. this is where I was hitting it manually. usually when I stopped at a light.

The Spider. This one also stalled with the lack of garage. I was hoping to get it to dales to work on (still might) but life got in the way and we have had fun doing other things like working on cars we NEED to work on. I still havent replaced the timing belt I need to do before I try to start the car. but it does spin by hand and has compression. I have the new belt and tension pulley ready to go. The rear panhard rod was dead. there are 2 types put on these cars. a straight one and one with a slight bend. the one on this car was the slight bend type so I bought a replacement. ISSUE. it needed the straight one. Still need to order it. The Steering idler also was broke and needs to be replaced. I did get a almost new top for it that I am waiting for spring to replace. hoping to do a video during a “garage day” with other Michiganders that have done this before. I havent bought the new seat upholstery yet as I am still thinking of what color. I am sure Kendra will have a say. it is originally black, but the top will now be tan so thinking I might want to switch paths and go tan. I know I am also in for a treat when it comes to rust. I already know I am going to have to fix a few spots on the bottom as well as one of the front frame rails needs a thick band aide.

On the Photography front. I got a new tripod. Figured my meijer special has done its time. In reality it was because I went to take a picture of the blood moon and the slight wind we had was too much and it wouldnt hold still. as I was looking at tripods, I started thinking about a gimble as I am getting more and more into wildlife. I found an inexpensive (Cheap) neewer brand. the reviews were pretty good with the exception of it is still as hell. sure enough, when I got it. it was crazy stiff. even with the lock bolt undone it would unscrew rather than spin. Quick google search and plenty of people fixed this issue by tearing it apart and re greasing it with wheel bearing lube. I went through the process and poof. smooth as silk. Great purchase. No big lens purchases this year. been pondering either a 70-200 or a 60-600. the 70-700 probably would be better as that fills a gap I am missing. I currently have 17-50 1.8, 85 1.4, 120-300 2.8. Sigma also makes 50-100 1.8 that might fit in nicely.

Well those are the projects for now. just a quick update before bed. I am also thinking of doing a video on where I am on the X as people have been asking for a video and more pics.
fiat x19 honda B series (b16,b18) rough guide

As I saw another person in the xwebforums site wanting to do the B swap, I was thinking would I do it again? hell yeah! and I think it would be much quicker this time. with the knowledge I gained what would be my quick how-to list? Well, here I go.  This is how I would do it again.

  1.  Remove fiat engine.
  2. Clean engine compartment
    1. remove cooling fan and mount
    2. remove fiat engine mount from chassis
    3. remove coolant tank mount.
  3. jack fiat about 30 inches from lowest spot on car  but level front to rear
  4. loosen Lower A-arms if not done with engine removal.  you will undo this and redo this MANY times.
  5. pull the engine up through the bottom, start to roughly place the engine/trans in place.
    1. you will have the intake off and the exhaust should stay on (for clearance). I also took the Dizzy off to keep it from getting broken
    2. transmission side A-arms will have to be unbolted to fit the engine in.
    3. You WILL have to notch the frame in the wheel well in order to have the space for the trans to fit.
    4. Height wise, dont make the mistake I did and put it to high. Watch the Shifter from the trans. if it is too high it will get in the way of the a-arm bolts.  This rod moves in and out, if you can put it below the suspension mount of the fiat it would be better.
    5. once you have the height close, put the a-arms back on (dont have to tighten)
    6. with the wheels on, either lower entire car or (much easier) jack up the suspension and put something under the tires so the car sits fully loaded in the rear.
    7. now you need to fully put the engine/trans in the right place.
      1. left to right, I found the front of the engine will be tight with the stock crank pulley really close to the frame. (single belt “race” pulleys will have more room)
      2. line up the hubs with the shaft mounts on the trans to be as straight as possible. I used wood dowlels  as fake shafts.
    8. once lined up, you need to block up the engine.trans to keep it from moving. this can be done in various ways. I kept the engine hoist on to hold most of the weight, then blocked up with wood on the bottom and wedged in the engine compartment.
  6. Time to start the engine mount planning.
    1. Several ways to do this and I am not going through all of them.  But here is the primer.
      1. front (cam side) of engine mount WILL involve cutting into the shock tower on that side.
      2. putting the engine in with the engine mount on the front of the engine is near impossible.  Works best to put it in place after putting the engine in as it would have to get around the frame rail.
      3. put the mounts on the engine and trans.
      4. create mounts from those to the car.
    2. Engine/trans will come in and out SEVERAL times during this.
    3. I did not use the Honda mount that it towards the front of the car. it isnt on all B series cars so I figured it wasnt really needed
  7. once engine is mounted, Order Drive shafts
    1. this can take time so once you can get it ordered the better.
    2. Yes the trans side is VERY short.
  8. Shift Linkage
    1. so, I originally used the fiat shifter and just extended the rod. to me I couldnt get it to feel right. someone might be able to, I couldnt.
    2. I decided to swap it to a cable system, not easy but feels awesome. For details, google both subaru mid engine shifter and 914 cable shifter
    3. when figuring linkage, I wanted to make sure this engine can be taken out easily so the shift rod configuration I couldnt get tight. if I welded up one piece rods it might have been better
    4. most people used the honda shifter/rods
  9. Clutch
    1. adapted fiat line to the honda slave.
    2. I had the cable trans with a cable to hydraulic adapter.
    3. next time would get honda hydraulic trans to make it easier
  10. put engine back in.
  11. intake
    1. intake WILL have to stick into the trunk a little.
    2. cuts will have to be made even if you plan on removing the access panel for good.
    3. Throttle cable
      1. I went with a new cable with using stainless tube as a guide.
      2. at the pedal, you will have to mount the cable lower than stock as if you leave it where it mounts in the stock location it will be too touchy. (know from experience)
  12. Wiring.
    1. After several attempts at modifying the stock wiring, I when the easy ($$$) route and ordered one from Rywire.
      1. about $500
      2. had loose ends for the parts that go to the car
      3. was built with no chassis wiring expected which the stock harness has them in ti and they wont be needed
    2. mounted ECU in the spare tire well
  13. Cooling.
    1. several ways again, but here is the info that is critical
    2. flow.
      1. main circuit
        1. out of head
        2. put in a bleeder valve in engine compartment at highest spot
        3. to top of radiator
        4. to bottom of radiator
        5. back to engine compartment with tee going to expansion tank
        6. to  thermostat at head
      2. Bypass comes from head to  back of thermostat
      3. Heater circuit
        1. from head to heater
        2. heater back to return behind thermostat
        3. NOTE.  Hondas are a bypass valve system, fiat is an on/off system.  honda people have deleted this circuit without issue so I dont think the on/off wil cause an issue. mine is looped with no heater.
  14. Instrument panel
    1. buy Honda dash and adapt
    2. Buy new guages
    3. I bought the tunerview RD-1
    4. Tunerview RD-2 is better, but more expensive and didnt work with my chipping software (crome)

well I think that is it.  a quicky primer.  with Walt’s power point

Things will make more sense

The Fiat x19 b16 swap

So I have been asked by several people about my Fiat X19 / honda B16 swap. I decided that I should just put the story here. Yes, story, this is not meant to be a technical document even though it might contain some technical stuff. First of all, I would like to thank several people and I will probably forget a few (sorry). First and foremost, my wife Kendra for putting up with my addiction to fiats. Second (only because he doesn’t feed me or take care of me) is my best friend and partner in crime, Dale Mund.

It is his mechanic background as well as a good garage in which to work in made this possible. I could not have done this without the help of several people on xwebforums.com. Especially Mr. Biswanger who supplied the PowerPoint on his conversion. (http://autox19.com/b16) The people of hondaswap.com for their help on the honda end. Rywire.com for the custom wiring harness. DriveshaftShop.com for the custom 1/2 shafts. Jeff Miller for his aide and advice on the exhaust. Elise for finding the original X that was converted.  And the Many friends I have that I have annoyed through these years.

So why the swap?  I was running the X with dual DCNF carbs and it was running pretty darn good. sounded awesome. One day it started backfiring. after weeks of trying to troubleshoot the backfiring I was thinking of a swap.  the B16 swap was done before, along with other swaps as well. What I liked about the B16 swap was it was relativity inexpensive, required no major structural changes and most of all it kept the spirit of the X by being a high revving engine. After many nights of thought, I decided to pull the switch.  First I sold the dual carbs. Then I decided to really make it hard to go back I pulled the engine. When I pulled the engine I found the reason for the backfires. although I checked the header for leaks, I didn’t check the o2 bung because I didn’t have fuel injection and it was capped with w bolt.  Well, the bolt fell out. Oh well, carbs are gone and engine pulled.  Now to sell the engine and trans. It went pretty quick as I really didn’t want to make money, just wanted it gone so I couldn’t turn back.

Next step was to find an engine and trans. I Looked at the importers but I was seeing if I could find it cheaper. I found and engine, and someone else with a transmission for about $1000 total. not a bad deal.  The engine was a OBD1 JDM and the trans was a mystery. Well it gave me a place to start. even if they were only to be a mule to get the mounts made. About 3 weeks later, I found a running honda with a OBD0 JDM. Called the guy up and he said it ran great, except it only went to 4000 RPM.  I knew it was probably in limp mode. didnt know why but I thought I would check it out. $1500 later and I was driving the purple pimp mobile home. i ran great (except limp mode) but was lowered too much and had funky ground effects. yeah, I am getting old. Now before we took it out, Dale suggested I get this one running right before we yank it out. He keeps me on track. I replaced the TPS sensor and reprogrammed the ECU to not check for O2 sensor and all was well, limp mode was off. Side note, it came with a chipped obd1 ECU.  so now on to the swap!

pimpmobile

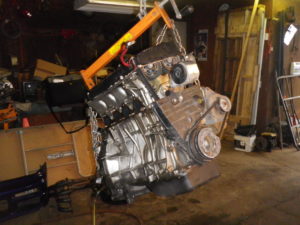
Ripping the engine/trans out was pretty easy.

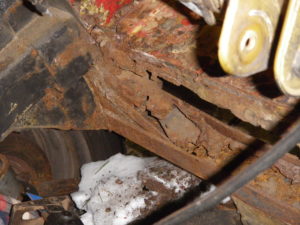
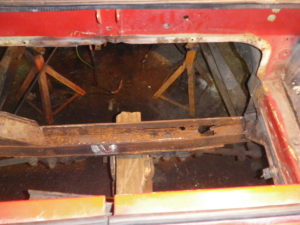
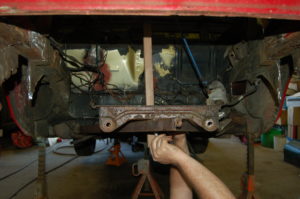
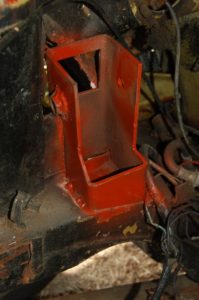
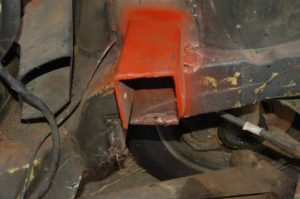
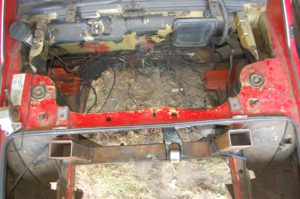
So we moved on to prepping the X. We had our first issue. After disassembling the back ens and removing a few covers, we found that the cross member was pretty much non existent.

That is from where the previous owner tacked on a few pieces for a little strength. After much thought and a few feeble attempts at fixing it, we gave up. Now to make a new cross member. The rear suspension is partially held up by this member so we now have to figure out how to make sure the suspension stays straight. Dale came up with a pretty cool jig that held the suspension in place while we cut the old member out.

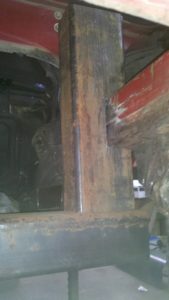
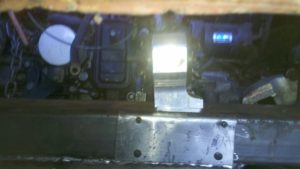
Grabbing some very large steel tubing (probably too big) we built a new cross member. Used the jig to keep the suspension points in place while we welded the crossmember in place.

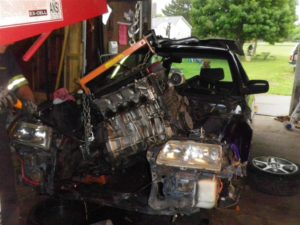
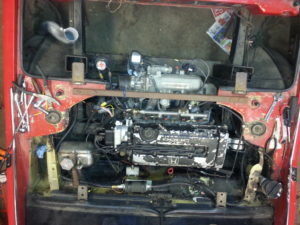
Starting to get real fun! I cut anything from the engine compartment that wasnt needed for it to run, including the fiat mounts.  We then slid the engine and trans in place. just like was noted from other that did the swap, we needed to notch the frame on the transmission side.

Other than that it looked pretty good. from there we started mocking up the new mounts. things worked out pretty well, bought new bushings, fabricated the mount that bolts on to the transmission.


now we bolted the engine in. It fits!  woo hoo!!  oh  wait. we need to put the intake on.  ugh. Looks like we positioned our engine just a little higher than the one in the powerpoint. Well, this wasn’t meant to be a show car, so POOF cut that cross member out, replace it with a bar and go with hood clips for the engine cover.  there, problem solved.


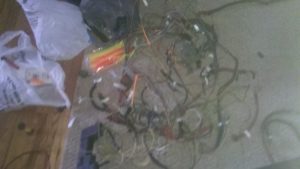
Now for electrical. there are SEVERAL websites that show wiring diagrams for the honda b series. I was thinking this would be a great time to hone my electrical skills.  Yeah. that looked good on paper. After several months of struggling I had a working harness. except it looked REAL ugly.

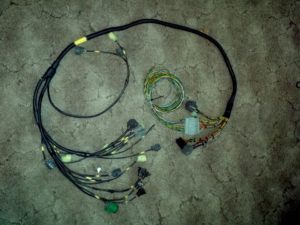
at this time I called up rywire and piked up a race harness. yeah, it was expensive, but it was right. and it looked good.

Now for fuel. I am going to eventually go with a fuel cell up front, but for now the stock tank will work. picked up a Walbro pump as the X had a carbed engine and that pump wont work on a fuel injected engine. (i had an electrical rather than mechanical) Had a new line made forgoing from the pump to the honda filter.  I kept the stock filter because it is a good filter and there was an easy spot to mount it. Now the moment of truth. Time to start it. We weren’t trying to drive it, so nothing else was needed right now, even the coolant lines weren’t run. It didn’t start. more trouble shooting. After sending the harness back to rywire with my ECU so they could test it, we found it wasn’t on the ECU/wiring end. We were not getting spark. New Dizzy time.  Now we had spark!   still wont run. Compression test showed we had compression, but not as much as we should. Static timing. Yup. timing was off.  looks like the belt slipped at some point in time. new belt as well as a new crank pulley (the other was cracked so a new one would be best) and we had compression and she started up. YAY!

Onto Coolant! yeah, this was an interesting one. how to route it when the 2 engines werent exactly the same. the fiat had more manifolds to support the fiat system. We ended up using the stock stainless Reservoir Tee’d into the return line from the radiator. then plugged the top nipple that we wouldn’t use. Started back up and no leaks! of course we didn’t let it run too long. not sure if the thermostat opened but I digress. We added a tunerview II so we could monitor things because nothing really connected to the fiat dashboard.

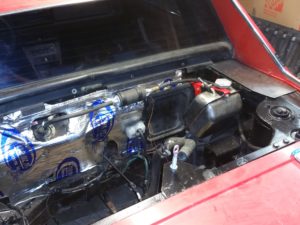
Now to get to the 1/2 shafts. I left this until later so I could prolong the $800 expense as long as possible. I measured and ordered them. they were delivered pretty fast and looked great. Rather than put them in, then take the right back out, we decided to remove everything now that everything “worked”. we took the engine out to clean up the engine compartment. because of how we have it routed, it only took about 2.5 hours form start to the engine being out. From there I cleaned up some welds, removed a few more extra wires and such.  I put a new firewall insulation and added the hood clips to hold the engine lid and trunk.

Now the engine goes back in. Slick as snot.  now the 1/2 shafts.  not so slick. they didnt fit. Not even close. UGH. it has now been a little over a year since I bought them. This is not going to be good. Called them up and they were wonderful. They said this kind of project timelines happen all the time. Well after 3-4 shots of trying to get it right (finally shot a video explaining why they didnt fit) It was correct and they fit like a glove.  EXCEPT…  yup more issues. with the suspension fully unloaded, the shafts couldn’t get enough angle because of the CV covers. Driveshaft Shop gave me high performance road race covers which are much stronger than normal, but doesn’t allow the angles I needed. So I replaced those with VW off road covers. Perfect.

Now onto linkage. In theory it is pretty simple. When you move the trans form the front to the back, Where a push from the driver seat to the selector rod did A, a pull to the selector rod will do A. So reverse everything.. NO. wait. because the shifter that once was routed to the front is now going to the back, its function is reversed as well. 2 reverses equals same! playing around between the fiat shifter and the honda shifter, I decided to stay with the fiat shifter. Only one rod to manipulate. I did have to shift where it is mounted a little in order to get it headed to the right spot as straight as possible, but it worked.

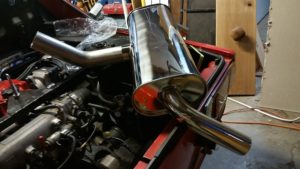
Exhaust.  Before I go into that, I am going to explain a little of my plans. I plan on rebuilding the other B16 I have and turbo charging it to a moderate 250 HP. (in a 2000lb car). this is important because I would like the exhaust to be able to be used after I do this. i.e. the downpipe going to the same place as the header does now.   so I threw the header on and. yup another issue. it sticks too far back. as in the flange mount is actually behind the car. the fiats back curves in, so it wasnt behind the whole car, but behind where the body workj is. either way, it wont work. After consulting with many people, it was decided to hack the header and shorten it. yes I will lose “the optimum length” but I am planning on going turbo in a year or so anyway. now for the exhaust. several ideas where floating around. one was vibrant has a muffler that has a side in and 2 out. We mocked it up and it actually seemed like it would work, probably have to do some modification where it exits, but it should work. I pulled the trigger. This was rough as it was pretty costly (because it was polished stainless) and if it didnt fit. that would suck. It came in. and it actually fits better than expected.


good weekend for fiat

Had a great week working on the fiat x19. Things are getting much closer. Started out with FINALLY getting the lights all working. The headlights pop up and down when they are supposed to! I had to rewire quite a bit as I couldnt find the short. so now there is an ON-OFF-ON switch controlling them. Not the best solution, but it works for now. The only issue with this is I dont have the “running lights only” option. not a big deal as I havent needed those since cruising in the 80’s. Now I just have all lights on or all lights off. good enough for now. Eventually it will be running a single push button switch with relays behind it to control power to the up or power to the down circuit depending on if the switch is on or off.
Put the Shift linkage in. Not really happy with the way it turned out, I may be re-configuring it.
Drive Shafts are in with the exception of 2 bolt as I seemed to have misplaced one of the CV Joint Bolt Plates. not a big deal at $3 a piece. (but shipping is still pretty high on it for some reason. Talking with the vendor to see if they can drop that price a little) I seemed to have been a little off on the measurements. Passenger side is a little tight and drivers is a little loose. My guesstamate looks like it is about 1/4 inch off.
This leads me to what is actually left. I will put this into 2 lists.
To get it moving:
1. Clutch line connected to slave (just need to shorten the line and re-flare the ends) and bled
2. Coolant hoses back in and bleed system.
3. Bleed Brakes
4. Fabricate Exhaust.
5. Figure out starter issue. (doesnt crank while on car. I can hear the solenoid, but doesnt crank. Bench test cranks, Engine turns over by hand)

TO clean it up after it is going:
1. Dashboard. Currently the fiat dash only has fuel gauge, turn signals, Alternator and bright light signals working. My hope is to get the current fiat gauges working. the tach I just need to find the right signal, I havent tried hooking up the temp gauge. the Speedo I am sure will have to be cut out and an electronic one put in its place. The second opiton if that doesnt work is going straight digital.
2. New single throttle cable. the current way is pretty hack. old cable linked to a new cable.
3. Wideband o2
4. Extend stock O2 wires
5. weld/bolt in roll bar.
6. cross bar on rear cross member

Phase 2. tear down 2nd engine. rebuild for turbo application.

Starting once agian

Moved my site to a different provider, so I am once again going to try this blog thing. My random, sometime VERY random, thoughts. Most of them will be about music,  photography, coaching, Fiat x1/9’s, racing, My odd projects.

I am ADHD and I am hoping this might help me squash my brain from going out of control too often

Phoenic